Print and cut your prototype at home
Overview
The distance between a card on your screen and a card in your hand is one sheet of paper and a pair of scissors. Print at home turns your game into a PDF you print on your own printer and cut out. It is the fastest way to get cards on a table, and it is the first thing most designers do before they order a print-shop copy. You need a printer, paper, and something to cut with.
To start, open the Export stage and choose Print at home. The dialog asks one question, shows a preview of your real cards, and keeps the totals (pages, cards per page, prints) in its footer.
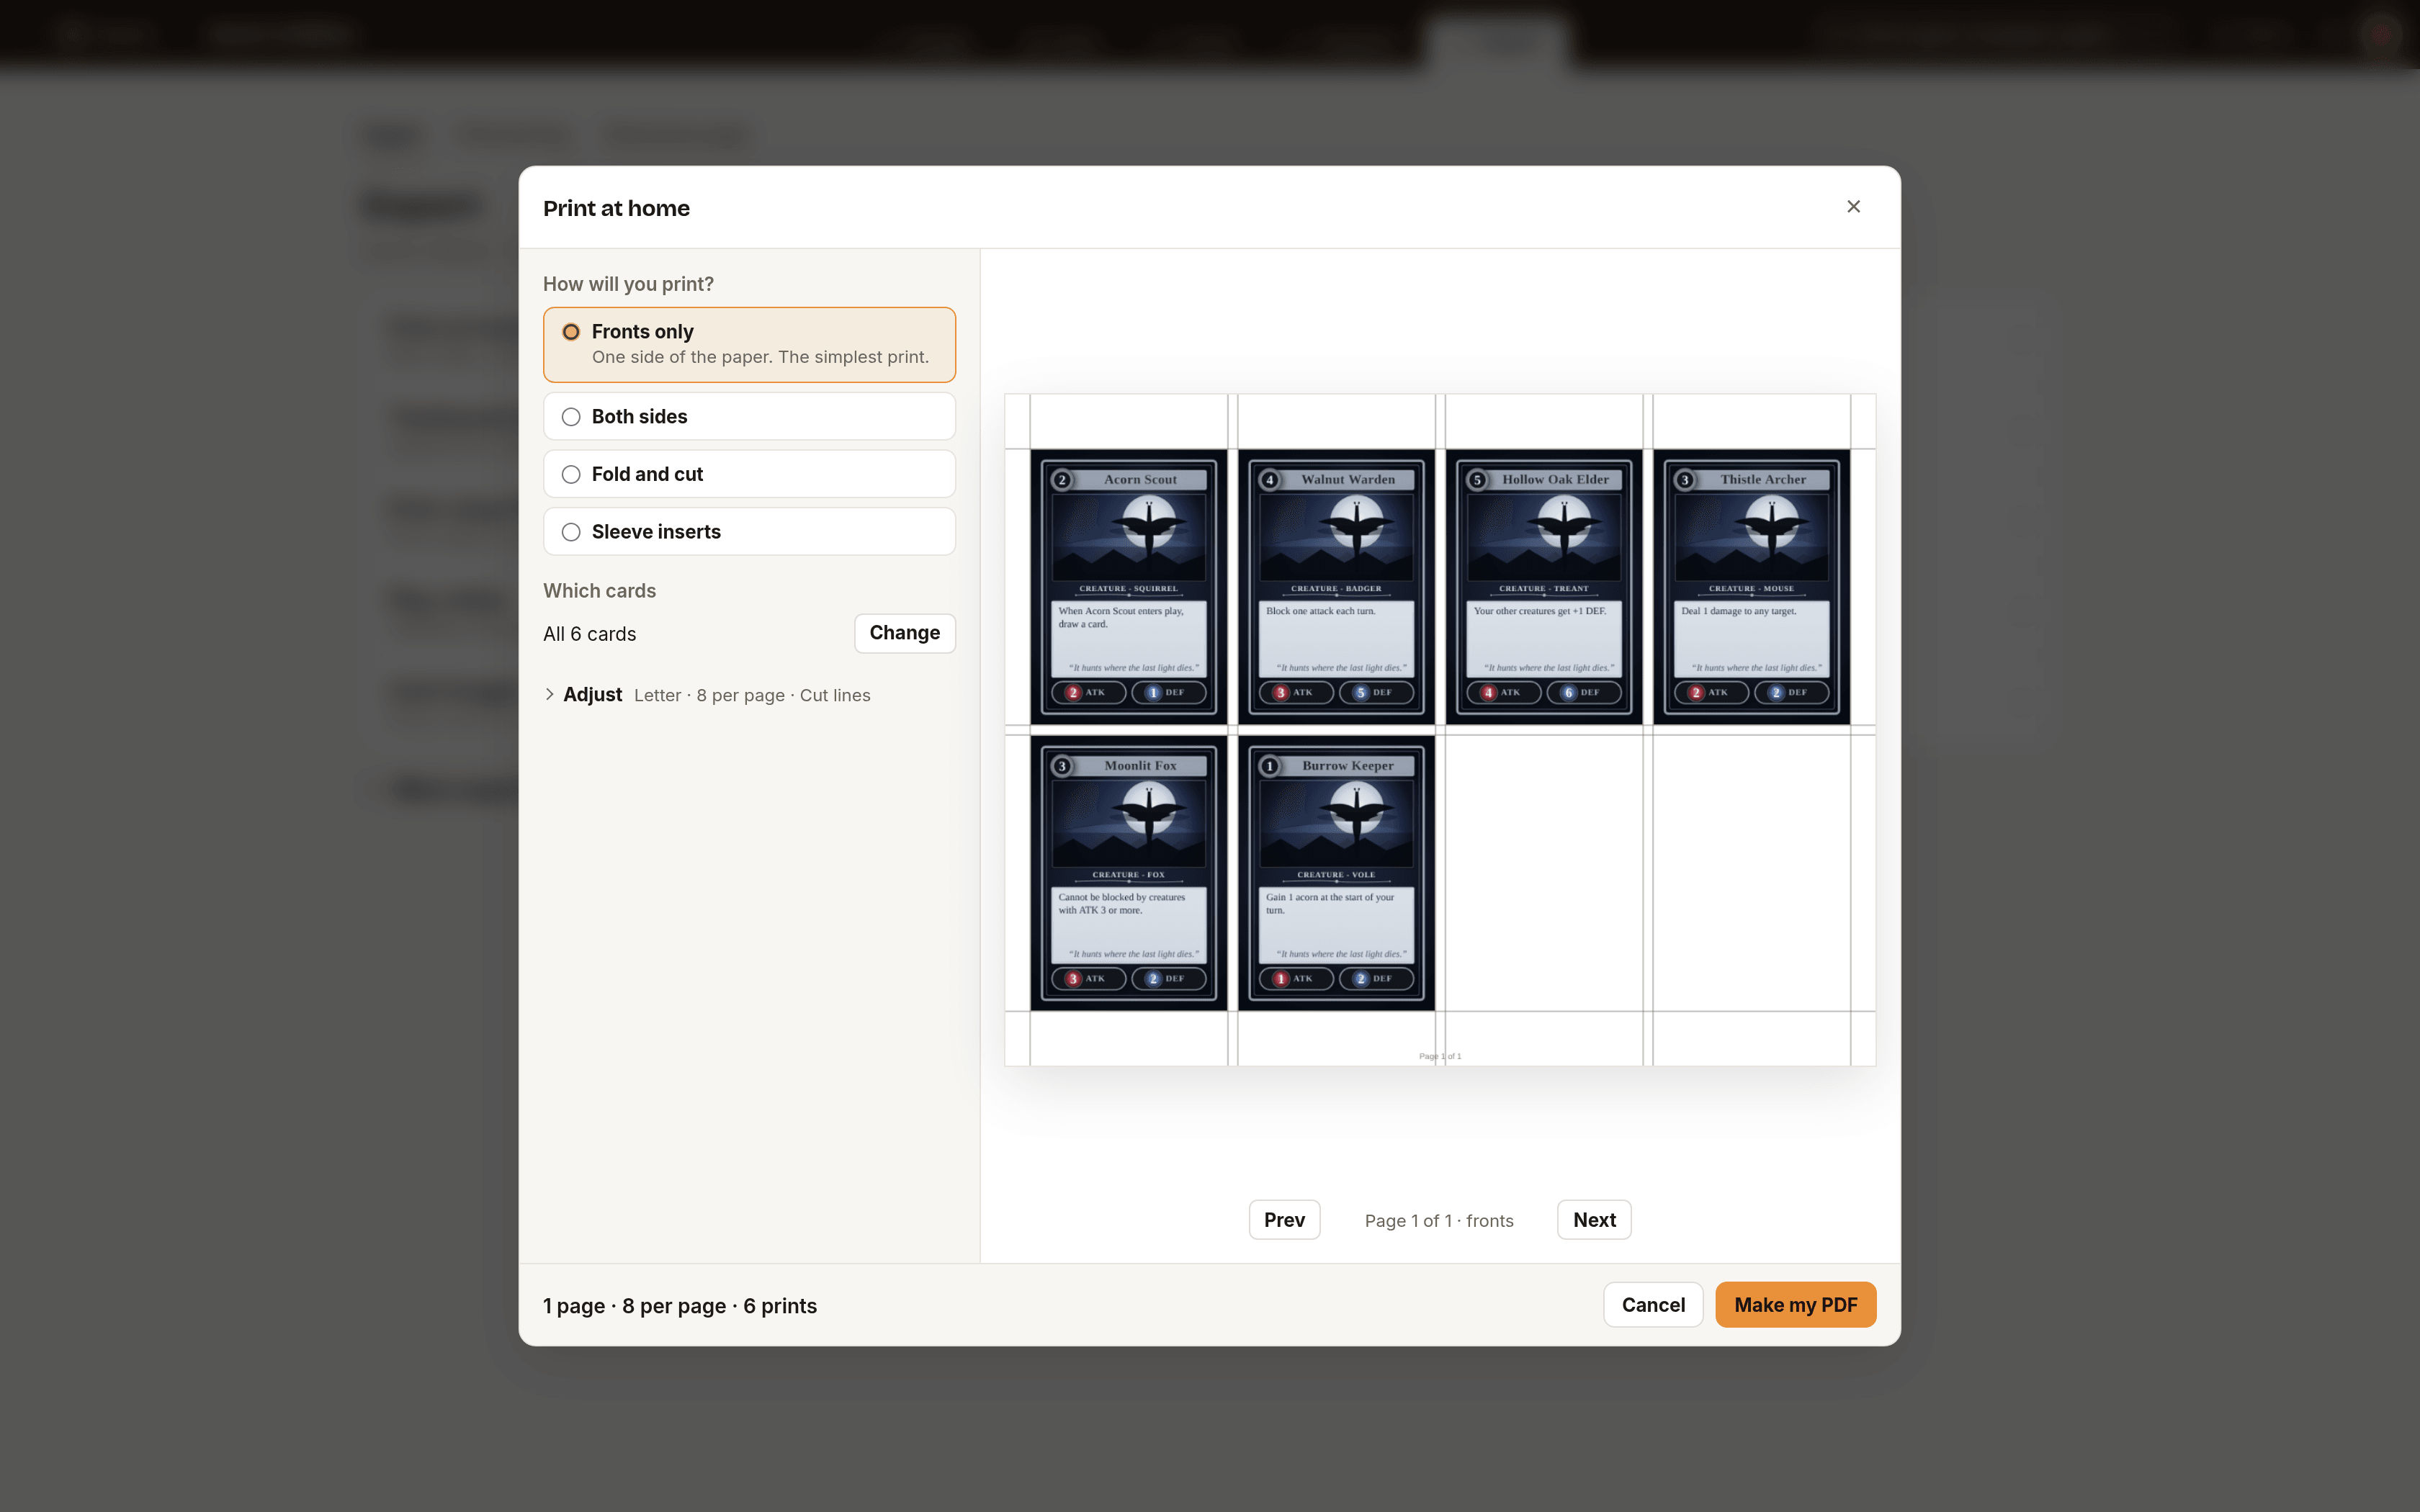
How will you print?
Pick the choice that matches the paper you have in mind.
- Fronts only: one side of the paper. The simplest print, and a good start.
- Both sides: backs line up on the other side of the paper, so a sheet turns into finished cards after one cut. Needs a printer that prints on both sides, or you can flip by hand.
- Fold and cut: front and back side by side. Fold, glue, then cut.
- Sleeve inserts: thin fronts that slide into card sleeves in front of a spare card.
Set your printer
Two printer settings matter more than any setting in Chitmunk.
- Print at Actual size (also called 100% or "Do not scale"). "Fit to page" shrinks your cards, and they stop matching sleeves and the cut lines.
- For Both sides, choose two-sided printing and flip on the long edge.
Line up the backs
Every printer pulls paper in slightly differently, so backs can land a millimetre or two off. To fix it:
- Choose Both sides, open Adjust, and select Print an alignment test page.
- Print the file two-sided at Actual size, flip on the long edge.
- Hold the sheet up to the light. Compare where the cross on the back sits against the cross on the front.
- Type the gap in millimetres into Back offset, left/right and Back offset, up/down. Right and down are positive. Each box takes up to 5 mm either way.
When a finished print comes out slightly off, the done screen offers the same test page under "Backs a little off?".
Adjust the sheet
Everything beyond the first question sits behind one line called Adjust. The line shows your current values (for example "Letter · 8 per page · Cut lines"), and Chitmunk remembers them next time.
- Paper size: Letter, A4, Legal, Tabloid, A3, or Custom size with your own width and height in inches. Turn the page picks Best fit, Upright or Sideways.
- Page margin and Cards per page: leave it on "Most that fit" unless you want a fixed layout of 1, 2, 4, 6, 8 or 9.
- Space between cards: a little room makes cutting easier. More space means fewer cards per page.
- Cut lines: None, Corners only, Crosshairs or Full lines. Corners keep the printed card clean. Full lines are the easiest to follow with a ruler.
- Print a little past the card edge: adds an edge you trim off, so no white slivers show if your cuts drift.
- Page numbers, and for several decks, Deck names as headings and a Contents page.
- Page order (Both sides only): interleaved for two-sided printers, or fronts first then backs if you flip by hand.
Cut like a pro
- Use a metal ruler and a craft knife on a cutting mat. Scissors wander; a knife follows the line.
- Cut the long lines across the whole sheet first, then the short ones.
- A corner punch rounds the corners in one squeeze and hides tiny misalignments.
- Print on 65 lb or heavier paper, or slide each card into a sleeve with a spare card behind it.
Print the copies you need
If your spreadsheet has a column called Copies, Qty, Quantity or Count, Chitmunk prints that many of each card. A 0 skips the card, and a blank cell means one. Under Which cards, the Copies menu switches between "As many as the column says" and "One of each card". With no such column, you get one of each.
Print only what changed
After you print once, Chitmunk remembers what each card looked like. Next time, Which cards offers Only cards changed since your last print, with a count. That saves paper while you tune numbers.
Turn on Tiny version mark on each card and every print gets a small label such as "P7 · 18 Oct" in the corner. When a playtester says "the cost on the dragon is wrong", you can tell which print they hold.
The done screen
Choose Make my PDF. When it finishes you get a done screen with the file name, the page count, the cards and the prints, plus a reminder: print at Actual size, and flip on the long edge for two-sided. Choose Done to close, or Make another to try a different mode. The file goes to your Downloads folder, named after your game.
Troubleshooting
- Cards print smaller than the sleeves. The printer scaled the page. Choose Actual size (100%) in the print dialog.
- Backs are shifted. Print the alignment test page and enter the Back offset. Check that you chose flip on the long edge.
- Backs come out upside down. Printers name the flip differently. Choose flip on the long edge, print the alignment test page, and check which way the back comes out. If you flip by hand, switch Page order to "Fronts first, then backs".
- White edges show after cutting. Turn on "Print a little past the card edge" and add a little space between cards.
- Too many pages. Check the Copies column, and the "Which cards" line for the deck count.